


Granite is one of the construction materials adopted by the population since time immemorial. Its beauty is that it never goes out of style; you can use it to achieve a modern and traditional look.
Do you also want to take advantage of granite and adopt it as your countertop material in your kitchen or bathroom? Do you know how to install it successfully?
This article gives a guide you can follow for the installation. Read on! Here’s the guide:
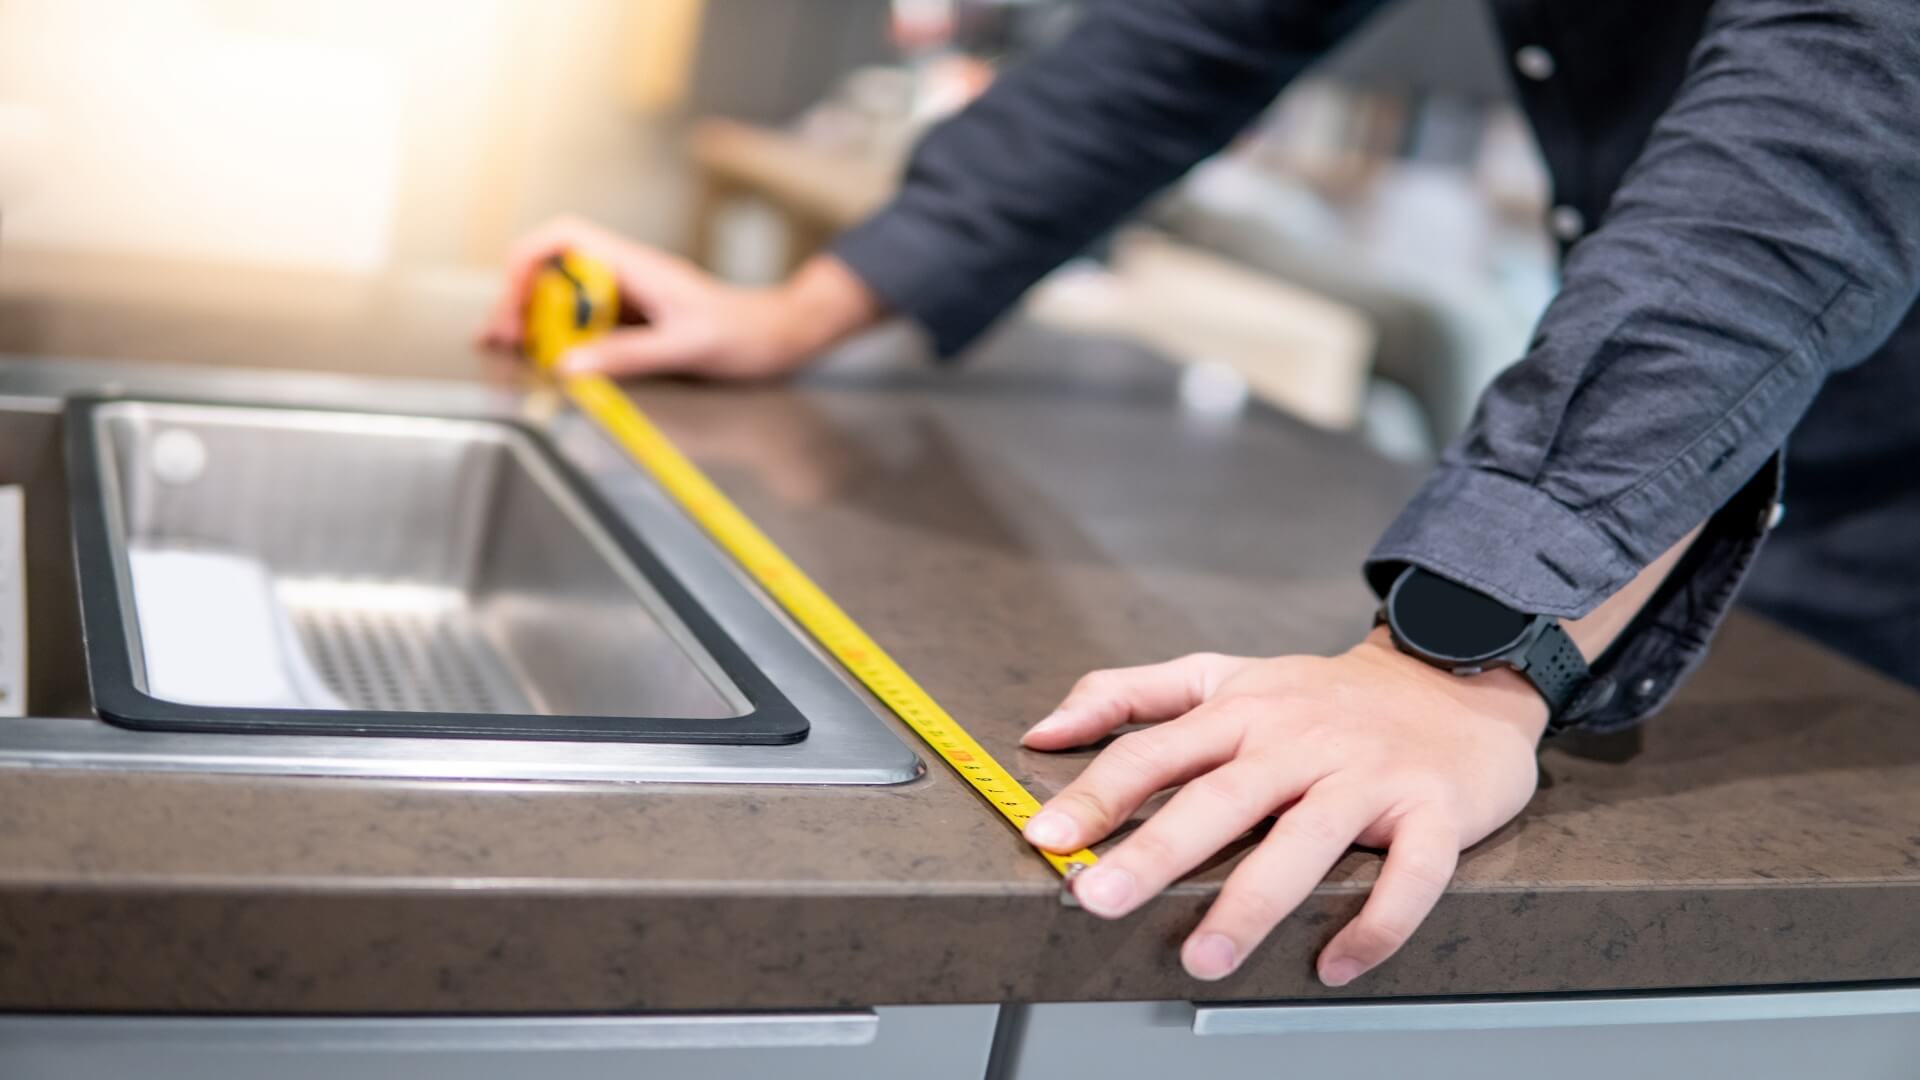
Take Measurements
The first step is to take measurements for the granite. Doing so will ensure you get the right-sized countertop. It shouldn’t be too big and lead to wastage or too small and end up not meeting your needs sufficiently.
Suppose you’re installing a kitchen granite countertop. Measure the size of the cabinets you’ll place your countertop, including the overhang. The overhang is the section that exceeds the end of the kitchen cabinet; it shouldn’t exceed 1.5 inches.
It’d help to add a template using cardboard. Place the boards in the manner you want the granite countertop to appear. Cut the cardboard according to your preferred design and take the measurements of the remaining boards. These measurements are what you should use to order your granite. Consider seeking assistance from the vendor you’ll source your granite countertops Orlando. Most vendors offer measuring services for accuracy when placing an order.
Gather The Materials You Need
Before the granite arrives on site, gathering all the tools you need for a smooth process is important. You’ll need a level, chalk, caulk gun, acrylic caulk, sealant, epoxy, seam setter, circular saw, grinder wheel, and PPEs (Personal Protective Equipment.)
How do you use each of these? Their use will pop up in this guide; worry not.
Besides these accessories, you need to buy granite countertops. They come in various patterns, colours, thicknesses, etc. Your preference should guide your choice. It’d help to ask the vendor for a stock catalogue to compare different granites and choose your ideal one.
Install The Countertops
With all the tools and granite with you, it’s time to install your countertops. Please start by laying the granite, placing where each should go without bonding. It’ll prevent errors by helping you to pinpoint issues and rectify them.
Mark out any areas that need modifications using the chalk. Here, use the circular saw to cut out the sections you don’t need and follow with a grinder wheel to smoothen the cut surface. As you do this, be careful to prevent dropping the granite countertops. They might get damaged, or you could injure yourself. Also, wear the right PPE, safety goggles, and work gloves.
Bond The Countertops
Once the granite is as desired, with the patterns and sizing right, you need to bond the countertop to the underlying surface. You can use the kitchen cabinet as the base for your countertops or place plywood. Should you opt for plywood, ensure you screw it in place to provide a firm base for your countertop.
If you have granite countertop parts that need joining, use two-part epoxy to join them. Once you apply the epoxy, place the seam setter over the area to ensure proper bonding. Let the epoxy dry for approximately an hour before proceeding. It’s a process you should consider working with a contractor if you’re undertaking the project as a DIY. Epoxy can be dangerous if you don’t handle it carefully.
Next, you want to attach the countertops to the base. Apply acrylic caulk using the caulk gun along the perimeter of the countertop on the underside. Ensure it’s enough. Where you’ve left sections for sink installation, add the caulk on the inside side of the cut-out length.
Apply The Sealant
With the granite countertops bonded and dried up, it’s time to apply a sealant. Granite is porous and might stain easily with the stain setting in. It’ll make maintenance challenging. Therefore, it’s important to add a sealant.
Use a soft fibre cloth to apply the sealant, ensuring you put in an adequate amount and cover all the areas. It’s advisable to let it dry for approximately 24 hours before using your countertop. Once dried, you can proceed to use it for all your needs.
Points To Note
For your newly-installed granite countertops to serve you for many years, you must take care of them. Taking care of it entails cleaning it with a granite-cleaning solution. You can purchase this from your countertop vendor. Alternatively, use a mild cleaning solution, like one with dish soap.
Also, the sealant is likely to wear off over time. Be sure to replace it every two years; your vendor will advise you accordingly.
Conclusion
From the discussion, it’s clear how easy it is to install granite countertops. All you require are the necessary materials and an installation guide. This article is one of the installation guides you can adopt for your project. You won’t make any mistakes, ensuring the granite countertop serves you as it should in terms of functionality and durability.