


Misunderstood furniture specifications cause expensive problems late in a project. Here’s how design and interiors teams are using realistic visualisation to communicate concepts, align stakeholders, and lock in approvals — before procurement, fabrication, or installation begins.
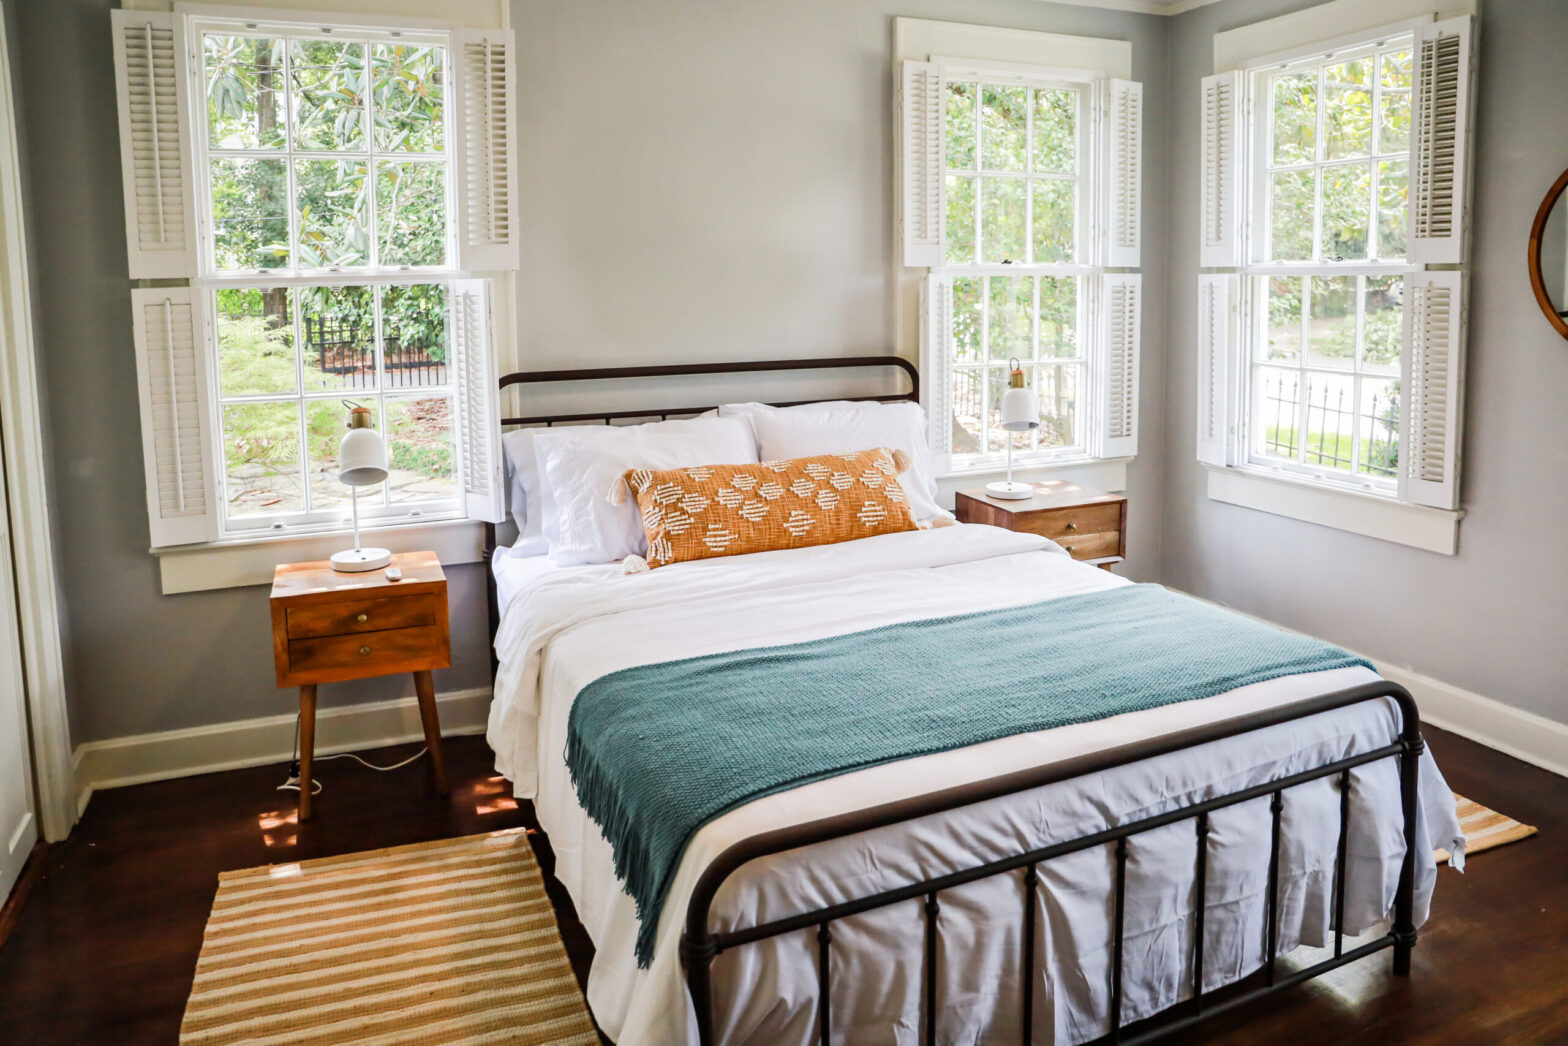
Furniture visualisation for an interior design concept presentation — showing scale, proportion, and finish selection in context before procurement is finalised.
Why furniture specs often get misunderstood in real projects
Design intent and built reality diverge most often not because of bad decisions, but because of unclear communication at the specification stage. A client approves a furniture schedule without fully understanding how a selected finish reads in the actual space. A contractor interprets a spec sheet differently than the designer intended. A procurement team substitutes a fabric based on a small swatch sample that looked right in isolation but reads incorrectly at scale.
These aren’t failures of expertise. They’re failures of representation. A written specification, a material schedule, and a 2D plan communicate what has been selected. They don’t communicate how it will look, feel, or fit when it arrives on site. That gap — between what the spec says and what the client imagines — is where most late-stage revision requests originate.
For commercial projects, the consequences are tangible. Furniture that arrives on site and doesn’t match the approved concept creates change orders, procurement delays, and strained client relationships. In hospitality and workplace fit-outs, where opening dates are fixed and lead times are long, there is often no viable path to correction. The cost of a misunderstood specification isn’t a rework line item — it’s a project-wide schedule problem.
The teams that avoid this pattern have one thing in common: they close the representation gap earlier, with better visual tools, before any commitment to manufacture or supply is made.
What realistic furniture visuals communicate better than flat references
A material sample board, a product data sheet, and a floor plan are all necessary documents in a specification process. None of them answer the questions a client is actually asking when they’re being asked to approve a furniture concept.
Realistic visualisation answers those questions directly. Scale and proportion in space — whether a lounge chair reads as intimate or oversized in a hotel lobby, whether a workstation layout allows the circulation the plan suggests — becomes legible in a rendered perspective in a way it simply isn’t in a plan view. Finish behavior under the room’s specific lighting conditions becomes visible: how a warm oak veneer reads under the warm downlights specified for the space, rather than under fluorescent office light at a supplier showroom.
Finish comparison at decision stage is another significant gap that visualisation closes. Presenting two or three finish directions side by side — the same furniture piece, the same room, the same lighting, different materials — gives a client the context to make an informed decision. That decision happens at the presentation meeting, not three weeks later after samples have been shipped, reviewed, and debated across email threads.
“The specification was correct. The client just hadn’t understood what it would look like. Visualisation closes that gap before it becomes a site problem.”
Layout confidence is the third dimension. A rendered spatial perspective communicates circulation, focal points, and the relationship between furniture pieces in a way no plan or elevation achieves. Project teams that present layout options as rendered views — rather than plan overlays — typically get faster sign-off and fewer post-approval change requests.
Where visualisation helps most in approvals and stakeholder alignment
Not every stage of a project benefits equally from visualisation investment. The highest-leverage moments are those where misalignment is most likely and most costly to resolve later.
- Design intent presentation. Early in the concept stage, before any specification is finalised. A rendered perspective communicates the mood, palette, and spatial character of the proposal in terms a non-design client can evaluate and respond to. Approvals at this stage are meaningful; rejections at this stage are inexpensive.
- Finish and material comparison. When two or three finish directions are under consideration and the client needs to make a decision. Side-by-side renders of the same furniture in the same space, wearing different materials, eliminate the guesswork that swatch-based decisions involve.
- Layout sign-off. When multiple furniture arrangements are being evaluated for a space. Rendered plan views or perspective views of each option give stakeholders the spatial information needed to choose — without requiring a site visit or a physical mock-up.
- Pre-procurement confirmation. A final rendered view of the specified scheme, presented before any purchase orders are issued, gives all parties — designer, client, procurement team — a shared visual reference for what has been agreed. It functions as a visual contract.
- Stakeholder briefing. For projects with multiple decision-makers — a hotel brand’s design committee, a corporate client’s facilities and C-suite teams — rendered visuals allow everyone to review the same information without being present at the same meeting.

Finish and material comparison using visualisation — same geometry, same lighting, different material assignments presented side by side for client decision-making.
What teams need before creating furniture presentation visuals
The quality of a rendered presentation traces directly back to the quality of the inputs provided before production begins. Incomplete or ambiguous briefs produce visuals that require significant revision — and revision at the visualisation stage costs far less than revision at the procurement stage, but it still consumes project time.
The inputs that support efficient, accurate visualisation:
- Drawings or dimensions. Floor plans, elevations, and ceiling heights for the space. Furniture dimensions — width, depth, height, seat height — for every piece being specified. Scale errors in a presentation render are immediately visible and entirely preventable with confirmed measurements.
- Material references. Supplier material cards, finish codes, fabric references, or high-quality photographs of the specified materials. A finish name without a reference sample produces an interpretation. A reference sample produces an accurate result.
- Furniture selections. Confirmed manufacturer references for each piece, or detailed sketches and specs if the furniture is bespoke. The more precisely the furniture is defined, the more accurately it can be represented.
- Space context. Lighting specification (fixture types, positions, CCT), wall and floor finishes, architectural features, and any fixed elements that affect how the furniture will read in context.
- Approval goals. What decision needs to be made from this presentation? Layout choice, finish direction, or full concept sign-off? The output format — plan view, rendered perspective, finish comparison board — should be matched to the decision being supported.
Furniture presentation checklist for project approvals
✦ Furniture Presentation Checklist — Project Approvals
Inputs — confirm before visualisation begins
- Confirmed floor plan with dimensions and ceiling height
- All furniture dimensions documented — width, depth, height, seat height
- Material and finish references provided for every specified piece
- Lighting specification included — fixture type, position, colour temperature
- Wall, floor, and ceiling finishes confirmed
- Approval goals defined — layout, finish, or full concept sign-off
- Stakeholders identified — who needs to review and who has sign-off authority
Visualisation — consistency and accuracy standards
- Scale verified against confirmed dimensions before presentation
- Material/finish matches approved specification reference
- Lighting matches specified fixture type and colour temperature
- Camera height consistent with human eye level for review perspectives
- All layout options rendered from identical camera positions for fair comparison
- Finish comparison views use identical lighting and geometry — material change only
Presentation and sign-off
- All stakeholders receive the same visual reference before the review meeting
- Approved visual retained as the project’s confirmed reference document
- Any post-approval changes to spec trigger a visual update before procurement
- Final approved render shared with procurement and site teams as visual reference
- File resolution and format confirmed for presentation medium (screen vs print)
Mini example: one shared workspace, three layout options, two finish directions
Mini Example
A 400 sqm collaborative workspace — layout approval and finish sign-off
A fit-out studio is presenting a collaborative workspace for a professional services client. The brief calls for a mix of lounge seating, modular soft-seating clusters, and semi-enclosed meeting booths. The client has asked to see three layout options and two finish directions — a warm palette centred on natural oak and earth-tone fabrics, and a cooler, more formal palette using dark steel and charcoal textiles.
The approval process involves three internal stakeholders: the facilities director, the head of real estate, and the CEO, who will each review the presentation independently before a joint sign-off meeting.
| Presentation elementWhat stays fixedWhat changes | ||
| Room architecture | All views — same shell, same lighting spec | Nothing — space is constant |
| Layout options A / B / C | Same furniture pieces and finishes | Arrangement, circulation, zone allocation |
| Finish direction 1 vs 2 | Layout A (preferred from first review) | Material assignment across all furniture |
| Camera positions | Identical across all layout views | Nothing — enables direct comparison |
| Detail views | Seating cluster and booth detail | Finish direction per stakeholder request |
In a traditional process, presenting three layout options and two finish directions requires either multiple physical mock-ups — impractical at this project scale — or a series of plan overlays and swatch presentations that ask the client to synthesise information across formats. Most clients find this difficult. Decision timelines stretch. Stakeholders who weren’t at the presentation meeting form independent views that require reconciliation.
With a visualisation-led approach, each stakeholder reviews the same rendered perspective of each layout option before the meeting. The finish comparison is presented as a direct side-by-side view of the same space in each direction. The joint sign-off meeting has a clear shared reference. The facilities director, the head of real estate, and the CEO are all looking at the same images. Layout A is selected and Finish Direction 2 is approved in a single session. Procurement can begin the following week.

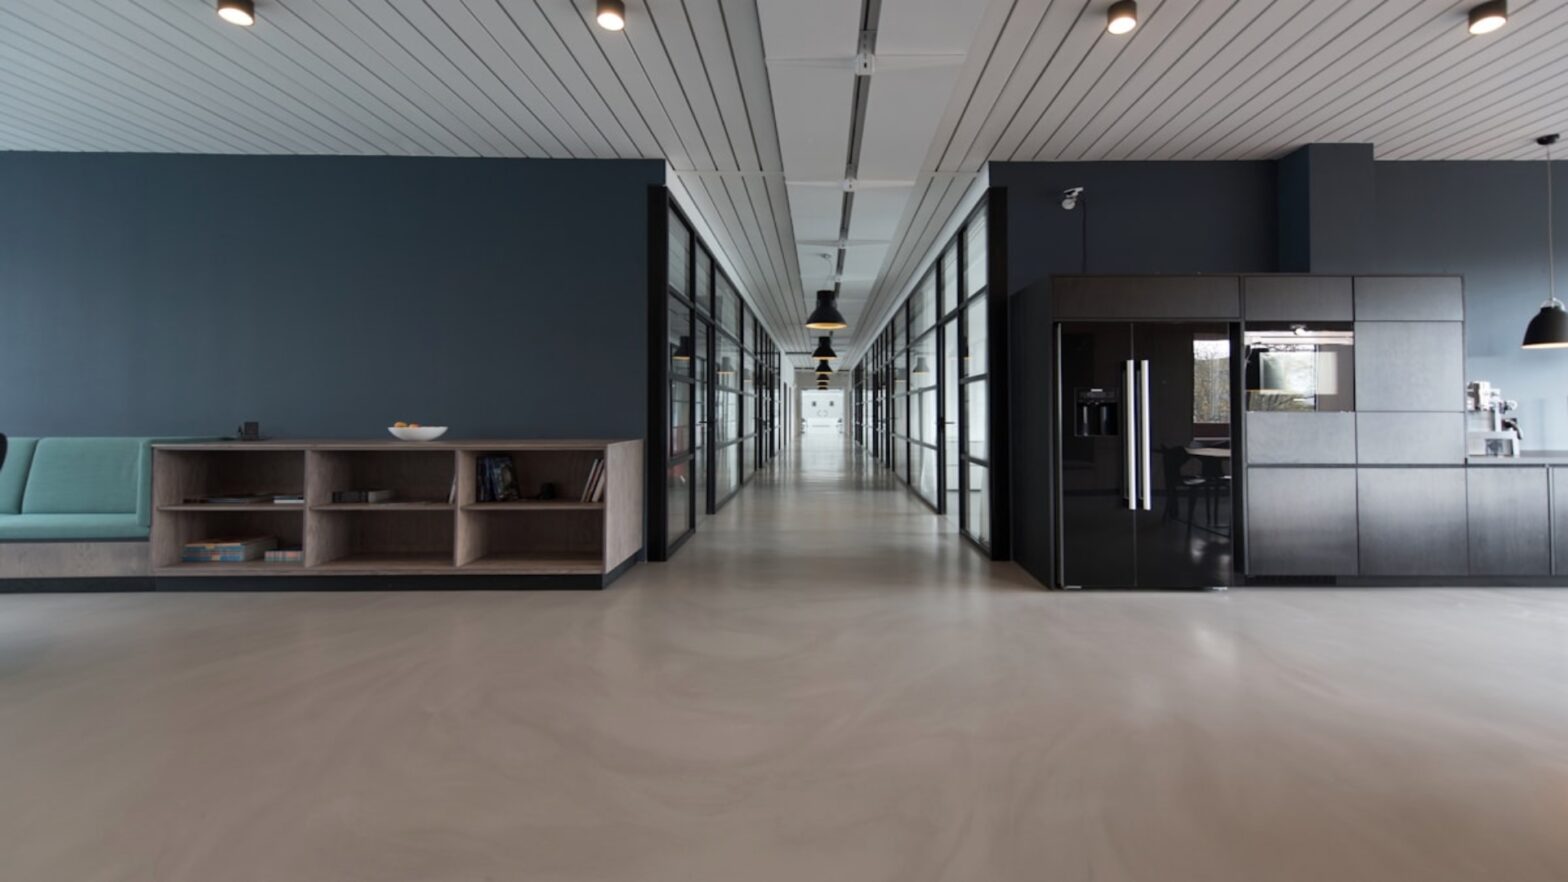
A rendered layout perspective used for stakeholder review — same room, three arrangement options, presented from identical camera positions for direct comparison.
Common mistakes in furniture presentation for interiors projects
Visualisation adds value when it accurately represents the specification and supports clear decisions. It creates problems when it misrepresents what’s been specified — even unintentionally.
- Unrealistic scale. A lounge chair that reads as a two-seat sofa in a rendered perspective, or a meeting table that appears larger than the room implies, creates false confidence in a layout that won’t work on site. Scale accuracy is non-negotiable for approval-stage visualisation. It requires confirmed dimensions — not estimation from a product image.
- Vague material definition. A render produced without accurate material references shows a plausible interpretation of the specification, not the specification itself. When the client approves a visualisation and the actual furniture arrives in a different-looking finish, the visualisation created the problem rather than preventing it. Every material shown must be traced to a specific, confirmed reference.
- Over-decorated scenes. Atmospheric prop styling — excessive decorative objects, unrealistic soft furnishings, heavy post-processing filters — may produce an appealing image but it obscures the specification. Approval-stage renders should communicate the design intent, not sell the dream. Clients approving a workplace scheme need to see the furniture, the layout, and the finishes — not a magazine editorial.
- Visuals that don’t match the actual specification intent. A render that shows furniture arranged differently from the approved layout, or materials that weren’t discussed, introduces ambiguity rather than resolving it. The best rendering practices for specification work treat accuracy as the primary criterion, not visual drama. A render is only useful if it shows what the project will actually be.
Building a repeatable visual process for furniture approvals
Design and fit-out teams that manage multiple concurrent projects need more than good individual renders — they need a repeatable process that produces consistent, accurate visualisation outputs across every project, without rebuilding the workflow from scratch each time.
A repeatable visual process has a few structural components. A brief template: a standard input document that captures dimensions, material references, lighting specification, and approval goals for every project, completed before any visualisation begins. This eliminates the most common source of revision — missing information discovered mid-production. A material library: a shared, maintained collection of accurate material assets — fabrics, veneers, metals, stones — that maps to the finishes the practice specifies regularly. A new project using a previously specified finish pulls from the library rather than re-briefing from scratch. A camera standard: documented eye heights and lens settings for the project types the practice works on regularly — workplace, hospitality, residential — so perspective views are directly comparable across projects and across design stages.
Understanding what furniture 3D rendering services actually involve at a technical level — how geometry is built, how materials are assigned and calibrated, how lighting is modelled — helps design teams write more precise briefs, set realistic production timelines, and evaluate outputs against the specification rather than against a general aesthetic impression. That technical literacy also supports better conversations with clients about what visualisation can confirm and what it cannot replace.
For practices operating across design and architecture project types, the return on a well-structured visualisation process compounds over time. Every brief template refined, every material asset added to the library, every camera standard documented — these reduce the marginal cost of the next project’s visualisation and improve the consistency of every approval presentation that follows.

From specification brief to approved render — a structured visual process reduces revision cycles and keeps stakeholder sign-off on schedule.
FAQs
When do rendered furniture visuals add the most value in a project?
The highest-value moments are at concept presentation — before any specification is locked — and at pre-procurement confirmation, when all parties need to agree on what has been specified before purchase orders are issued. Finish comparison presentations, where a client is deciding between material directions, also benefit significantly from visualisation over swatch-based review. In each case, the value is proportional to the cost of a late-stage change: the earlier the visualisation, the less expensive a revision.
Do teams need final CAD to begin?
Not necessarily. A confirmed floor plan with room dimensions and ceiling height is sufficient to begin space-level visualisation. Detailed furniture models can be built from manufacturer dimensions and reference images without CAD files. For bespoke or custom furniture pieces, detailed sketches or preliminary drawings are sufficient to begin. CAD files accelerate the modeling of complex or precisely engineered pieces — particularly case goods and structural seating — but they’re an advantage, not a prerequisite.
How can finishes be reviewed realistically?
The most reliable approach is a side-by-side render: the same furniture piece in the same room, under the same lighting, with different material assignments. This gives the client a direct visual comparison rather than asking them to evaluate materials separately and mentally compose the result. The accuracy of that comparison depends on the quality of the material references provided — physical swatches photographed in consistent light, manufacturer finish codes, or supplier reference images are all workable inputs. Generic material names without reference samples produce interpretations, not specifications.