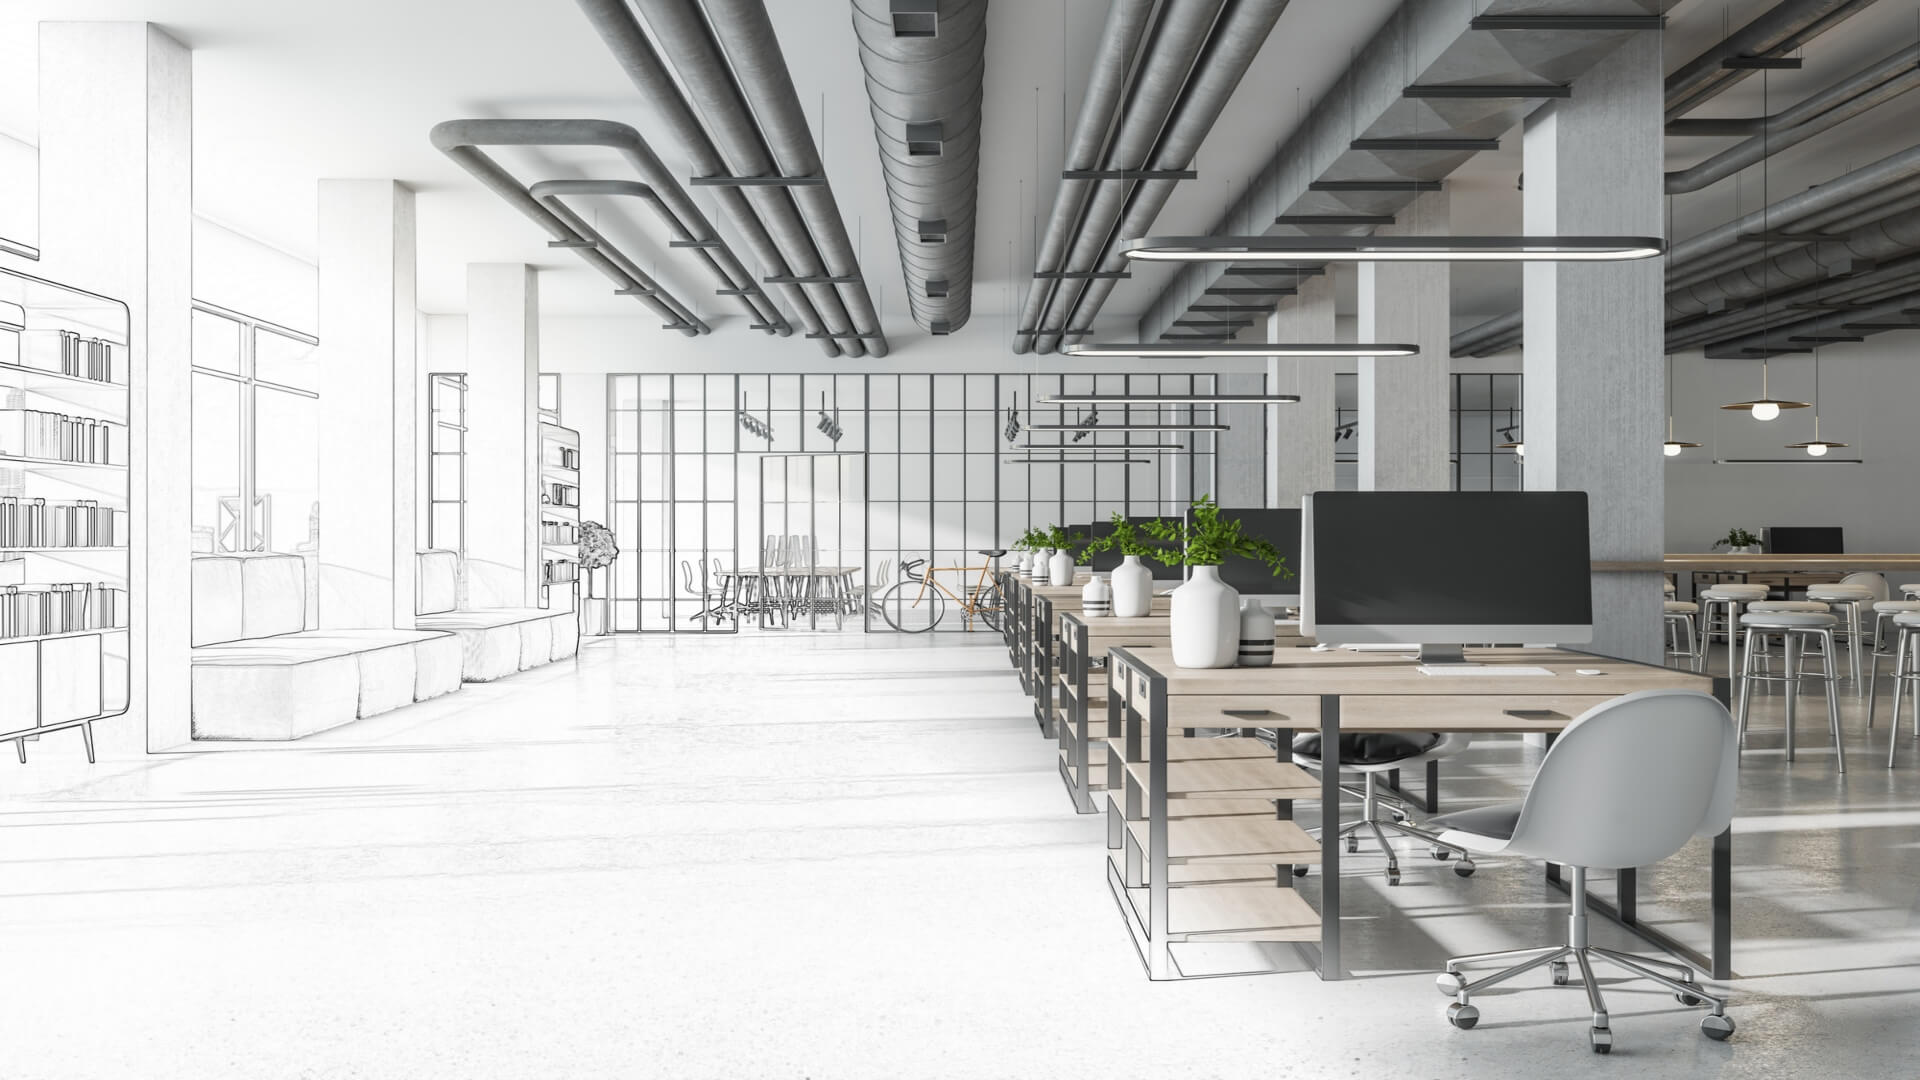


3D rendering is essential for many industries, from movie production to gaming and architecture. To create realistic images with a high degree of detail, professionals rely on techniques that improve the quality of their renderings. But what are these techniques? How can we make sure our 3D renders look as good as possible?
This article will explore practices to help you get the best out of 3D rendering. From optimizing scene geometry to using advanced lighting systems, you can enhance your visual results in many ways.
So, if you want to take your 3D rending skills up a notch, here’s all you need to know about setting yourself up for success when producing stunningly realistic visuals through 3D rendering.
1. Round Your Edges
Rounding the edges is critical in achieving a higher level of 3D rendering. This can be done using various tools and techniques, depending on your 3d visualization software. When rounded edges appear smoother than sharp ones, it helps to create depth and realism within your renderings. It’s important to adjust each edge individually, as this can provide more control over the final look of your scene.
Generally, rounding an edge doesn’t have to be complicated; often, a simple tweak can give your object a realistic touch.
2. Include Imperfections
Textures are essential for realistic 3D rendering. It helps highlight the imperfections of the objects you’re rendering, making it photorealistic.
A good way to do this is by playing with the gloss level and understanding how lighting affects the object. By adjusting the surface roughness of an object, you can control how much light is reflected off its surface. The rougher a surface is, the more diffusely scattered light will be. This can create greater realism in your renderings by adding subtle colour variations and highlights to objects in the scene.
3. Simulate Real-World Lighting
To do this, you must understand how light behaves and interacts with surfaces in the physical world. The first step is to identify which type of light source will be used. Once that has been determined, use software tools such as ray tracing and global illumination to replicate natural lighting conditions. This includes simulating soft shadows, reflections, refractions, caustics, colour bleeding, ambient occlusion, and more.
Secondly, tune your settings accordingly so all elements look realistic on the screen. Adjust parameters like brightness levels and falloff curves until they match what you see in real life.
4. Apply A Realistic Camera Angle
A realistic camera angle in 3D rendering can significantly improve the final product. A good tip is to consider the viewer’s perspective when looking at the design and adjust accordingly. For example, if you’re creating a rendered image of a room’s interior design, it might look more natural from an eye-level viewpoint rather than one taken from above or below. This can help create a sense of depth for viewers and make them feel like they are in the environment.
5. Use Lens Effects
Using lens effects in 3D rendering can help create more realistic images because lens effects are based on the same principles as actual lenses, such as a camera’s lens. They include depth of field, motion blur, and focal length adjustment. These elements can add realism to 3D renders by making them look like they have been taken with an actual camera.
In addition to adding realism, using lens effects can also be helpful when creating animations or special effects.
6. Scale Objects Correctly
When 3D rendering, it’s essential to ensure the objects are scaled correctly. It can help create a better illusion since you can generate a more realistic simulation of the scene. For example, if you’re rendering a bedroom, you’d want a room with a bed size that’s true to life. This can be done by measuring the real-world size of an object and then multiplying this number by whatever scale factor you need. You can use an online calculator to help you quickly calculate accurate scaling factors for each object.
7. Use PBR Materials
Physically-Based Rendering (PBR) materials are a great way to create realistic 3D renderings. By utilizing complex lighting calculations and physically accurate material models, PBR produces photorealistic results with minimal effort from the artist or designer. When working with PBR materials, it is vital to use textures that accurately represent the surface properties of your object. High-resolution images should be used for detailed surfaces, while low-resolution textures can still provide convincing results in more significant scenes.
Conclusion
Achieving the best possible 3D rendering is possible with the tips mentioned above. First, rounding your edges and using surface imperfections can give a more realistic look. Scaling objects correctly and using PBR materials can also yield better results.
It’d be good to know that the devil is in the details; that’s why it’s also suggested to mimic real-world lighting conditions as much as possible. All of this combined should help you produce striking images that stand out.