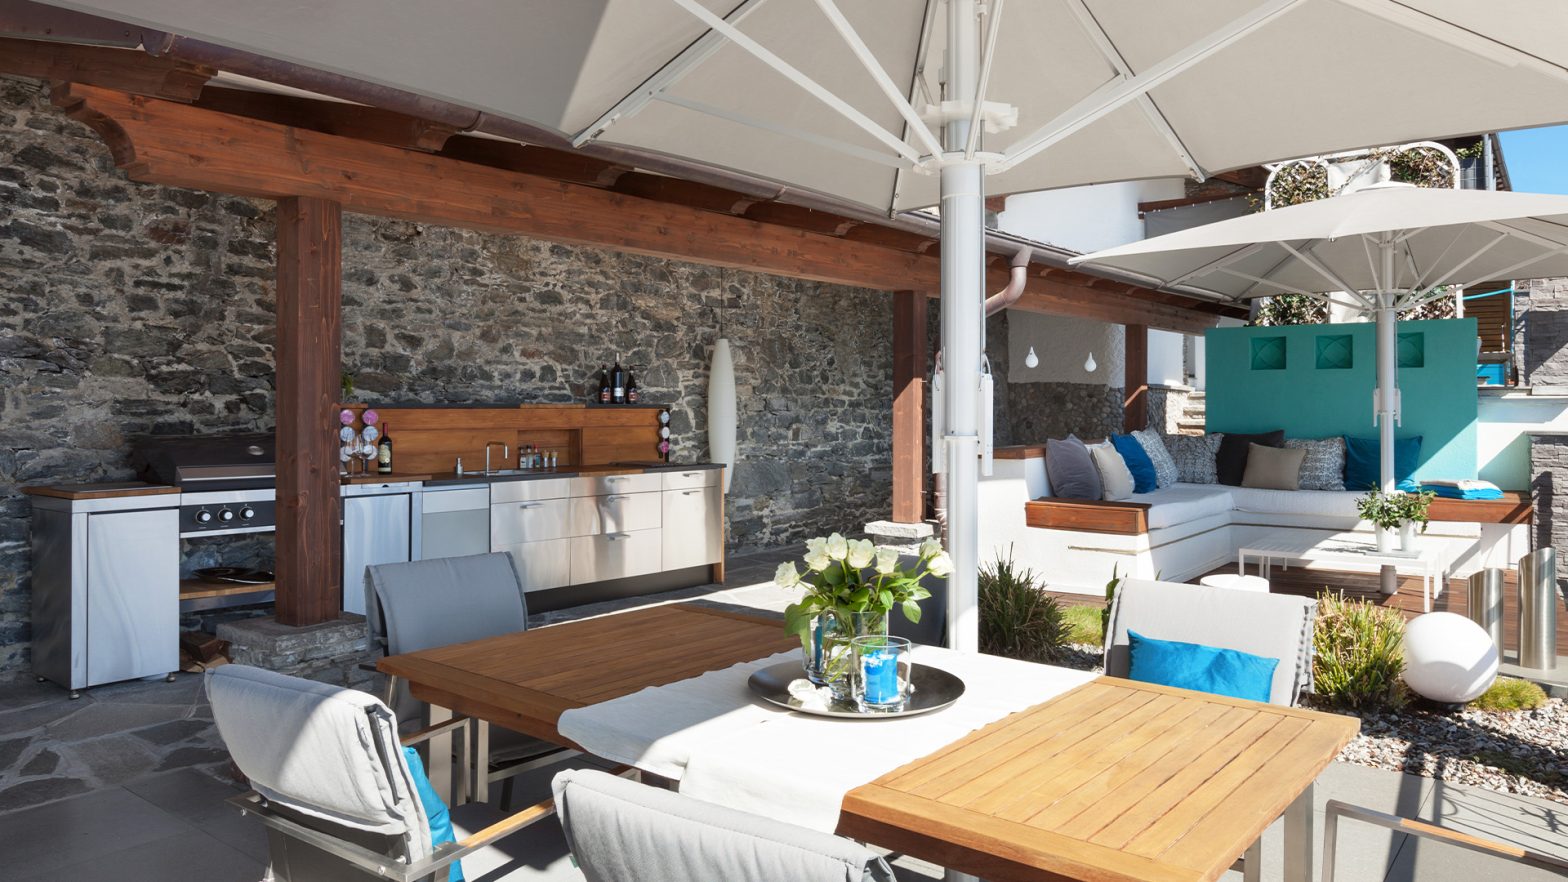
As the weather gets warmer and nicer, homeowners are wanting to spend more time in the garden. Socialising with family and friends often includes drinking and eating. Outdoor kitchens offer you a great place to prepare food and drinks in the garden. Depending on your budget, you could have space for storage, food preparation stations, a sink, and even electrical appliances for cooking.
The possibilities with an outdoor kitchen are endless. Garden design expert, Harry Bodell at PriceYourJob.co.uk has created this guide on how to build an outdoor kitchen yourself. If you’re confident in your DIY skills and looking to create something unique this year, why not consider installing an outdoor kitchen? Read the guide below to find out how to go about it.
Is It Possible to Build an Outdoor Kitchen As a DIY Job?
It is possible to build you own outdoor kitchen. However, it’s not always recommended. This is quite a labour intensive job and would require a great deal of DIY skills to achieve.
If you are confident in your DIY skills, there is no reason why you shouldn’t be able to build your own outdoor kitchen. If you are not confident in your DIY skills, it is recommended that you leave this type of work to a professional outdoor kitchen fitter.
Building an Outdoor Kitchen
Tools You’ll Need
- Circular saw
- Impact drill
- Angle grinder
- Saw horses
- Notched trowel
- Mortar mixer
- Masonry trowel
- Exterior screws
- Tape measure
- Speed square
- Hammer
- Gloves
- Pencil
- Adhesive
- Level
- Wrench and socket kit
- Caulk and caulking gun
Step 1 – Construct the Frame
Wood is considered to be the most DIY-friendly material for an outdoor kitchen.
Below are some points to consider when constructing the frame for your outdoor kitchen:
- Always begin with a blueprint or layout of your design before you start your kitchen build.
- Be sure to understand the specifications of all of the appliances and where you plan to situate them in your kitchen. That way, you can create all of the relevant openings for appliances within the construction.
- Start by cutting vertical studs, header, and footer pieces. These are the pieces that will make up the frame for your outdoor kitchen. You will need a circular saw or a chop saw for this step.
- Keep in mind that the frame for your outdoor kitchen needs to be lower than the desired height. Take into account the thickness of the countertop.
- Use a drill and exterior screws to fit all of the wood studs together.
- Cut cross supports – these will act as spacers and will also give support from the front to the back. These should be cut to the correct depth according to the depth of your grill island.
- Wood frames require insulated jackets for the cooking appliances. Be sure to use the combustible cut-out specifications.
Step 2 – Cover the Frame
Next, you will need to cover the frame. This is what you will be applying the cladding material to. Most cladding materials will need to have a masonry surface in order to achieve a proper bond. The frame covering also provides adequate protection and a moisture barrier.
The best DIY option for this is cement boards. Follow the steps below to cover the frame:
- Cut sheets of cement board that match the size of the frame.
- Attach the cement boards to your wood frame with exterior or metal screws.
- Make sure you cut the cement boards according to the openings for your appliances and cabinets.
- Apply a self-adhesive mesh in all of the corners and seams.
During this stage, it’s also a good idea to create cut-outs for your vents. Create cut-outs in accordance with the ventilation requirements for your chosen appliances. It’s important that you include enough ventilation for safety reasons.
Step 3 – Apply a Scratch Coat
The cladding material will need a rough surface in order to achieve optimal bonding. In order to achieve this rough surface, you will need to create a scratch coat.
Follow the steps below to complete this:
- Select the appropriate material. For cement boards, you will need to use an exterior-rated thin-set mortar mix.
- Mix the concrete with a masonry hoe or with an electric mortar mixer.
- Apply the concrete to your cement boards with a trowel.
- Score the concrete in order to create a rough surface. This will form the texture for the scratch coat.
- Score the surface horizontally with a ½” notch trowel. Tilt the trowel on a 45-degree angle.
- Start from the top and then work your way down.
- Try to keep the lines as straight as you can as a guide when you apply your cladding material.
- Allow the scratch coat to cure for at least 24 hours.
Step 4 – Install the Countertops
The process of installing the countertops will vary, depending on the material that you use.
It’s important to ensure that the countertop has cut-outs for appliances and these must all be matching the openings of the island base.
Install the countertop according to the type of material that you have chosen.
Step 5 – Install the Cladding Material
There are several cladding materials to choose from. The most popular choices are tile and stone.
Here are the main things to consider when installing your cladding material:
- Work from the bottom to the top when installing the cladding material.
- Create a mortar mix and butter this onto the back of the stones or tiles.
- Scrape away any excess mortar as you go along. Also, clean up as you go along.
- Cut the stones or tiles to fit before fitting them. This is especially important around the appliances and around corners. Use an angle grinder with a masonry blade or a masonry saw to complete the cuts.
- Make sure you account for flanges on appliances. You may want to place the appliances in place temporarily to use as a guide while you’re installing the cladding material.
Step 6 – Install the Appliances and Connect Utilities
Once the cladding material has been applied and is dry, you can then go ahead with fitting the appliances and connecting the utility lines.
Begin with the built-in grill and any appliances that will sit on top of the countertops. After that, you can then install the access doors and refrigerators and anything else you’re adding to the kitchen. Follow the manufacturer’s instructions when installing each appliance.
You may need to install outdoor plugs for your appliances to work. Make sure the plugs are suitable for the appliances that you are installing.
Final Thoughts
Outdoor kitchens can be a great addition to your garden. Whether you’re looking to host gatherings with friends or extended family members or whether you’re looking to extend your family’s dining to the outdoors, there are many reasons why outdoor kitchens are a great idea. If you are installing an outdoor kitchen yourself, it can be a hefty job, and you will have to make sure that everything is installed safely. However, it can be a very rewarding job that you and your family can enjoy for years on end.